So if you have been following this series of posts, you should now have a local mail server setup linked to both an outgoing and incoming relay service. However, how do we access this server to check our mail?
In the last post of this series I will focus on setting up a mail client (specifically the opensource Mozilla Thunderbird mail client). Note, whilst I have chosen to use Thunderbird, the steps would be similar for other well known clients such as the default Mail app in Windows 10, or indeed Microsoft Outlook.
Caveats
First things first, it’s worth bearing in mind that I have chosen specifically to hide my email server from the big bad web, only opening up port 2525 to incoming traffic from Dynu.com’s mail server subnets and masking my mail server IP using Cloudflare’s reverse proxy service. In laymans terms this means any mail client will only be able to contact my server when connected to my local network. This will be fine for desktop computers, but if you have a laptop or mobile device, once you connect to your mobile network or a network outside of your house, your client will not be able to connect to the mail server.
My solution to this is to set up a VPN on my local network which can be used by my mobile devices to receive my emails via my mail client when away from home. I have also set up webmail using the great opensource client RainLoop. RainLoop runs on a server within my local network, allowing me to access my emails securely over https within a browser.
Given the complexity of setting up both a VPN and webmail, I won’t be covering these steps in this specific post. However, I may cover the steps in a new series another time. For now though, if you are relatively competent with Linux and Docker Containers and fancy giving it a go yourself, I would recommend the superb PiVPN project as a super easy and secure way to setup your own VPN. You can also find a Docker Image of RainLoop here for a relatively pain-free way to enable webmail.
Of course, if the local only access is going to a pain for you, and you don’t have the skills to setup a VPN or webmail, you could choose to port forward TCP traffic on ports 587 (secure SMTP) and 993 (secure IAMP) to your mail server (adjusting your mail server’s firewall accordingly).
Providing you use an alternative domain to the one used for your email, DNS querying of your email’s domain hosted on Cloudflare would still mask your mail server’s IP, whilst allowing access to your mail server outside of your home network using the alternative domain. You would however be increasing exposure to the server by opening up ports 587 and 993 to any traffic. I’ll leave that decision down to your own risk assessment of the pros and cons.
Mozilla Thunderbird Configuration
So with the caveats out the way, here’s how you can get Thunderbird connected securely to your local mail server whilst connected to your local network. Note I am assuming here that you have already downloaded and installed Mozilla Thunderbird to your device from the Thunderbird website.
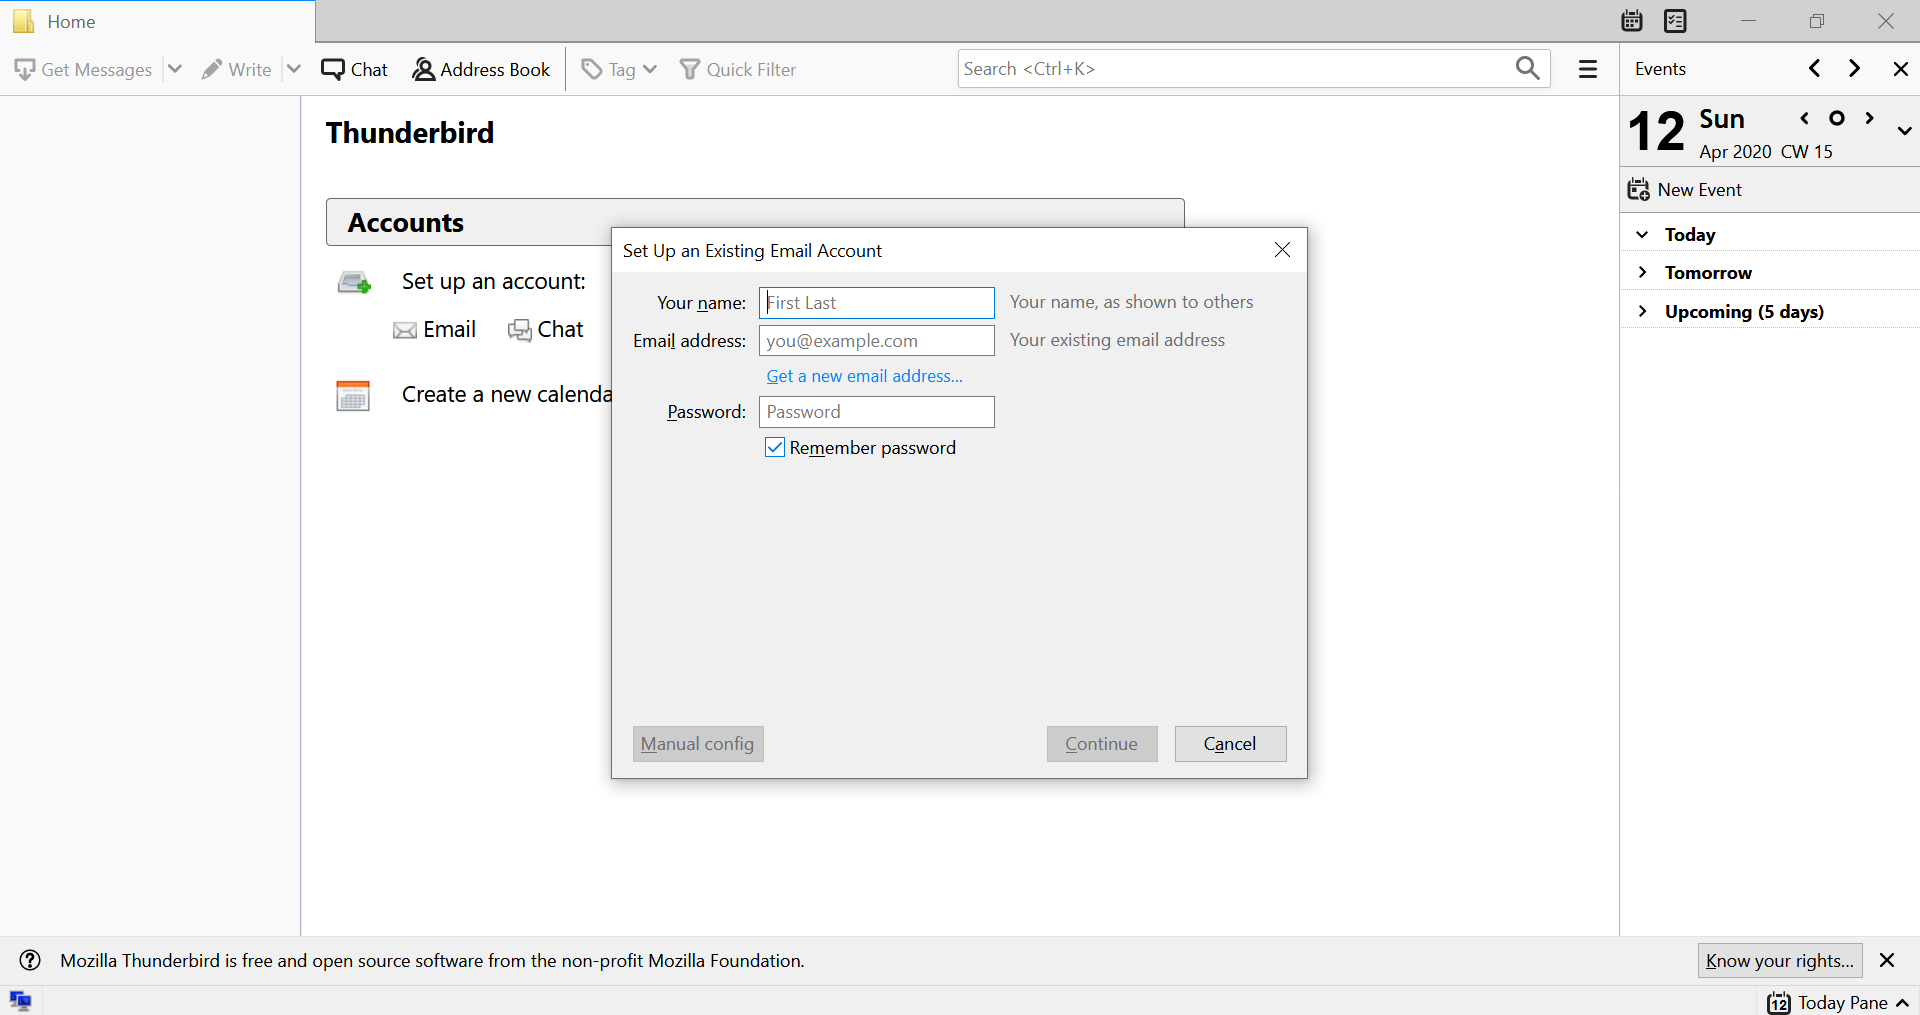
On opening Thunderbird for the first time you will be presented with the following screen. Start typing your name, email account password, and then your email address. The Manual config button in the bottom left corner of the popup window will change from greyed out to clickable – click it.
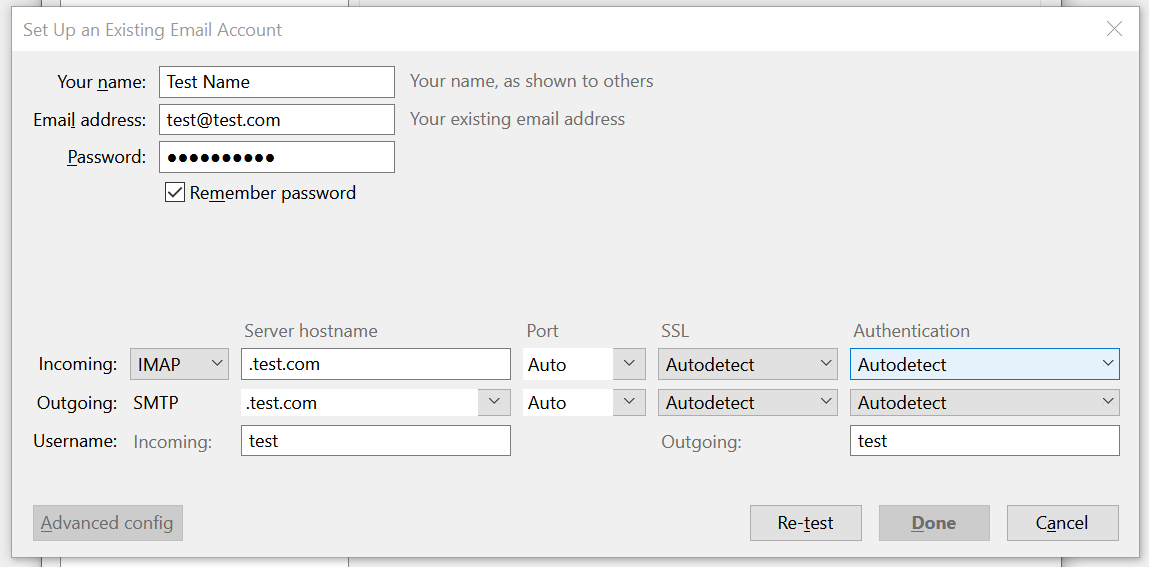
On clicking the manual config button the following window will appear. You will need to enter the local static IP address of your mail server under server hostname for both IMAP and SMTP. Select port 993 for IMAP and 587 for SMTP – SSL/TLS selected for IMAP and STARTTLS for SMTP. Choose either autodetect or normal password for authentication of both IMAP and SMTP. Fianly enter your email account username (just the alias – the bit before the @ symbol).
Once filled in as described above, click the Done button. Congratulations, you should now have the ability to check and send emails through your Thunderbird client!
0 Comments