So far we’ve set up a mail server with an outgoing SMTP relay to handle all our sent mail without it being flagged as spam. However, what about receiving mail? If you are ok with exposing your server to the big bad Web, you could simply set up some MX records within your DNS pointing towards your mail server URL. However, I personally wanted some resilience and peace of mind, knowing that something was there to take over, if for whatever reason my mail server went down. I was also uneasy about exposing my server to the big bad Web, so I opted for a store and forward service from Dynu.com for $9.99/year.
Of course, there are other alternative services out there, and I welcome any other suggestions, but for me Dynu seemed to offer exactly what I wanted for a very reasonable price. Note however, Dynu is an American company and (at the time of writing) they do not appear to be part of the US Privacy Shield Framework, so you need to do your research regarding GDPR compliance if choosing to use them.
Store and Forward (Incoming) Relay – Configuration
You will of course need to first set up an account with Dynu, purchasing their store and forward service. This is a pretty simple process, so I won’t go into the detail other than point you to the link. As always, I would recommend using a strong password and setting up two factor authentication on your account. Note, when setting up the service, you will need your custom domain name to hand.
Once you’ve registered a new account and purchased the store and forward service, if you navigate to the Mange Email Service area of the administration pages you should see the following for your custom domain:
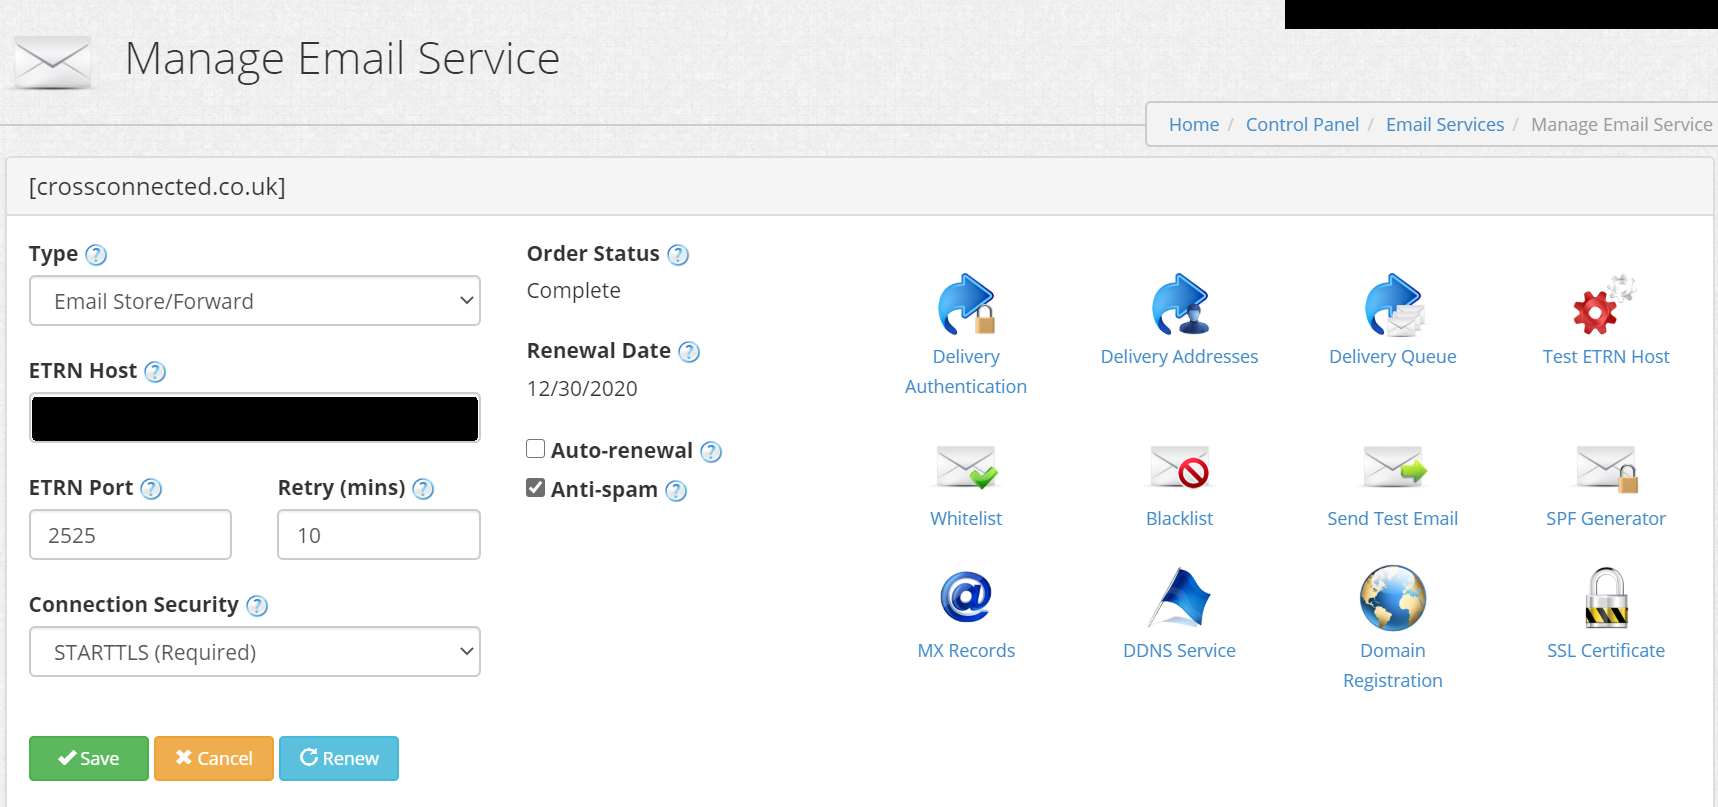
The three important settings to note are the MX Records, ETRN Host, ETRN Port and Connection Security. I have also personally disabled auto-renewal of the annual subscription, and have kept the the anti-spam setting enabled (this avoids me having to configure spam filters on my Synology Mail Server).
The first thing you need to do is add your ETRN Host and the required MX records to your Domain’s DNS. Dynu.com should list these in the Manage Mail Service landing page. However, if they don’t, you can reach them from the MX Record icon shown with the @ symbol pictured above. This this video shows you how to do this with Cloudflare – just remember not to proxy the records. The ETRN Host will depend on whether your ISP provides you with a static or dynamic public IP address.
If your public IP is dynamic, if you have been following this series of posts from the start, you should have already configured a Dynamic DNS sub-domain (this sub-domain should be entered for your ETRN Host). If you have a static IP address, unfortunately Dynu requires a hostname rather than IP address. You therefore have two choices – create an unproxied A record or CNAME within your Cloudflare DNS pointing to your public IP – or creating an alternative sub-domain (not intended to be used publicly) linked to your public static IP address. The former will expose your mail server IP address (given that the traffic cannot be proxied by Cloudflare, as it is not over the http protocol), the latter will avoid exposing your IP address within Cloudflare for your email’s domain.
For Synology NAS users, the solution to static IP masking is easily overcome, as you can use Synology’s sub-domain and Let’s Encrypt service to create an alternative URL with a Trusted CA SSL certificate (required for secure authentication). This video explains the setup process (note you want to ignore the process for a currently owned domain, as the idea is to set up an alternative domain for free via Synology’s sub-domain services). Once you have this alternative address, enter it into the ETRN host field and click save.
With regards to the ETRN Port, because we are now talking about incoming communication, we now need to consider our server’s firewall configuration and port forwarding setup on our router. Most internet service providers (ISPs) block port 25, hence we have to choose an alternative port for Dynu.com to use when it relays mail to our SMTP server.
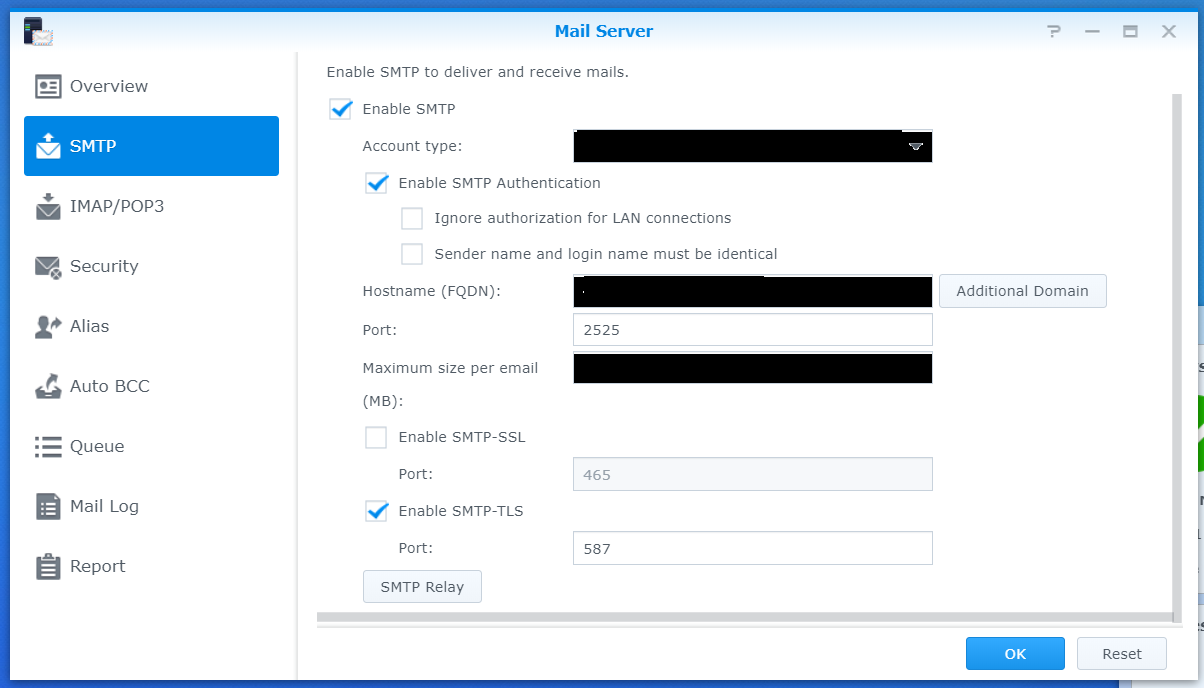
I personally chose to use port 2525, but whichever port you use, you need to make sure your router is port forwarding any TCP traffic on port 2525 to your SMTP server’s local static IP address and associated port. I have set my Synology Mail Server to use the same port (as shown below), but you could keep the default port 25 and forward traffic from port 2525 to port 25 on your server within your router settings if you so wished. Note also I have authentication enabled for all requests on the server!
If you are sensible, you will also have a firewall on your mail server blocking any incoming traffic apart from those specified in your firewall rules. For the Store and Forward service to work, the firewall will have to allow incoming TCP traffic from your chosen port. I have personally chosen to set up a rule that only allows incoming TCP traffic over port 2525 for Dynu’s servers listed in the SPF record (you can get the related IP subnets by using the following tool). This should add another layer of security over simply allowing any incoming TCP traffic over port 2525, and I would highly recommend doing this.
The final steps are to choose an appropriate type of connection security (as pictured below), as well as imputing the authentication credentials for Dynu to be able to relay emails to your server. With regards to the former, you have a choice of “START-TLS Required” or “SSL/TLS” (do not select “START-TLS Optional”, as this could result in your connection being insecure). I chose to use “STARTTLS Required”, as this is what my Synology Mail Server required – you may need to try both, depending on your mail server setup.

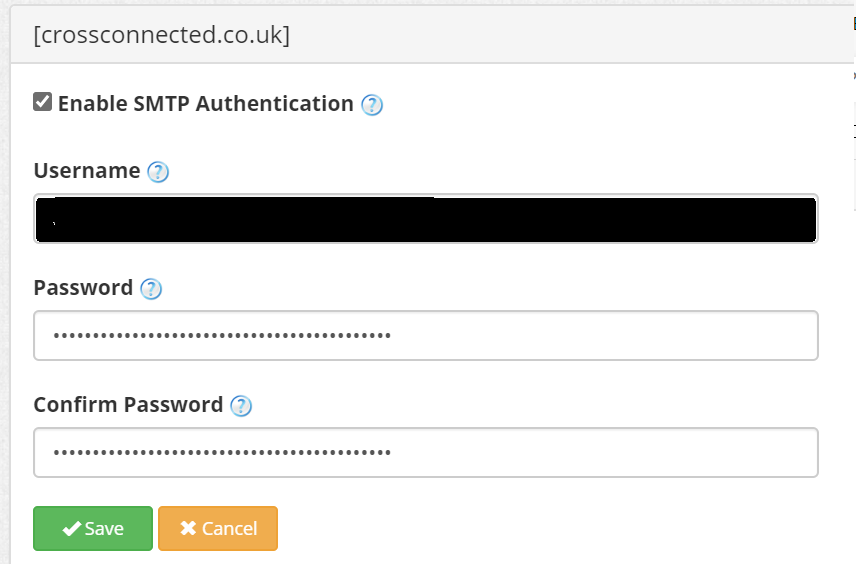
With regards to authentication credentials, you need to select the delivery authentication option (shown with a blue arrow) on the Manage Email Service page. This will display the following options which you need to fill in and click save. Note you’ll need to tick the enable SMTP Authentication option and the username may require the domain after the @ symbol (rather than just your user’s alias).
With all this configured, you can send a test email using “Send Test Email” option from the Manage Email Service landing page. To check whether this has been received, you will need to set up an email client (such as Outlook or Mozila Thunderbird) – something I will cover in my next post.
1 Comment
Jonathan Feucht · 24 July 2022 at 06:05
If you have Synology auto-block enabled (Control Panel -> Security -> Account -> Enable Auto Block), you might be wondering why you can’t get mail forwarding from Dynu to work, especially if you sent more than 10 messages within 5 minutes. At some point, Dynu might have been blocked, but you don’t know it. If this is the case, you might want to white-list the IP address associated with Dynu.